Friday, March 23, 2012

Arduino + Light + Buzzer + One Button


What you are seeing in the picture above, is a button at the bottom that consists of conductive fabic on two sides of a spng that has holes cut in it. So, when u press the button, the two conductive fabrics touch each other and send a current through the conductive thread to the postivie and negativewires next to the arduino board.  Once a button is pressed a tune plays and our LED at the top of the picture lights up.

More Progress Videos

Saturday, March 17, 2012

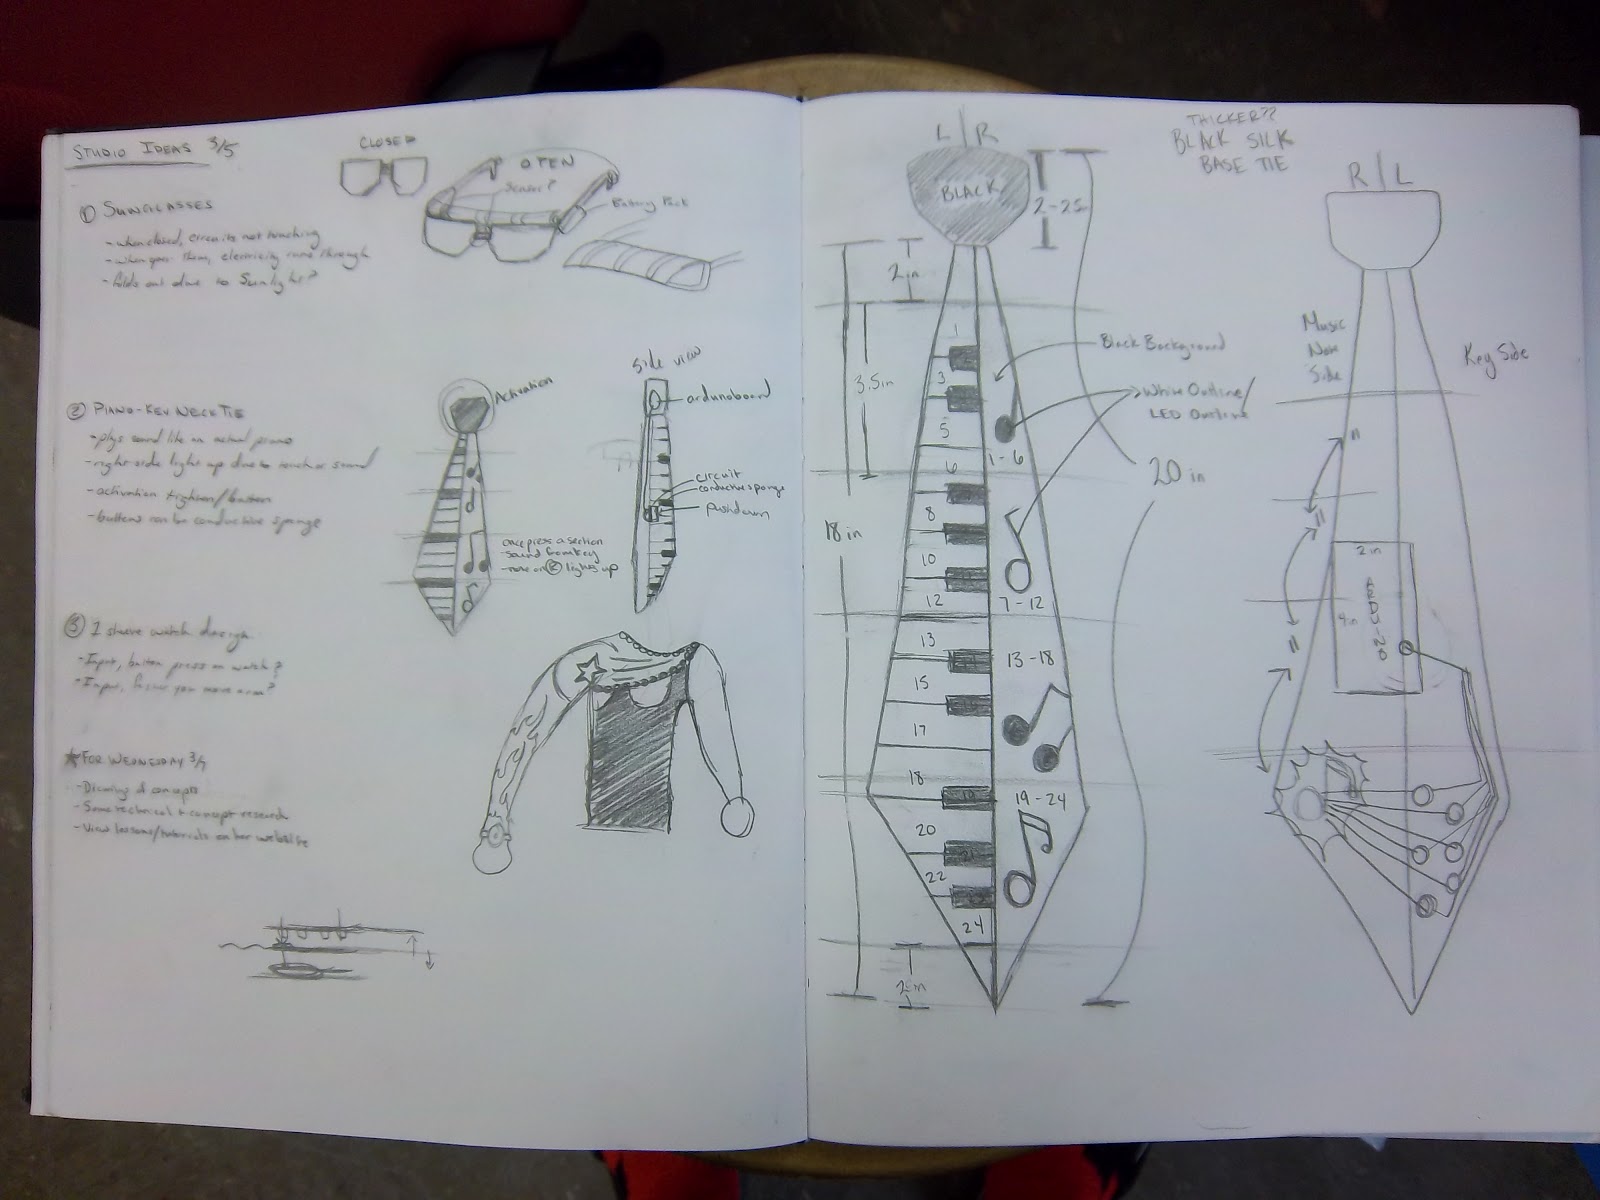
TIE DESIGNS

Supplies for Assembly


Supplies Obtained: 9 volt batteries, black base tie, black/white fabric, black/white thread, needles

Supplies Desired: Conductive Thread, Wires

Status Complete: 10%

Wednesday, March 7, 2012

Arduino Trials - Button Light Up

Wearable Interactive - Piano Key Necktie Ideas


The left side of our tie will be the actual keys in which you press and hear a certain note.  Matt Ackerman and I have divided the tie space into 4 equal sections in which a cooresponding music note matches up with each equal spce.  Our initial idea is to have the music note to the right of the key that was struck light up.

Intro Arduino Trial Video